
telos I2C equipment and Python
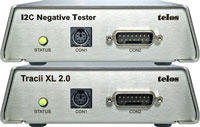
telos I2C products such as telos Tracii XL 2.0 or the telos I2C Negative Tester are outstanding tools for the development of I2C related products and offer a wide range of functions that are useful if not even mandatory for the analysis of the behaviour of I2C bus systems. All these features can be intuitively applied using the GUI application I2C Studio.
However, I2C bus systems are usually not an isolated element in a product and in certain cases developers might want to control the I2C development tools using a script language rather than using a GUI application. Such scripts allow certain test scenarios to be repeatedly performed and may also allow the integration of other development devices like CAN tracers or logic analysers in a complex test. Such scripts may also automatically check the results of the programmed operations.
During the past years, Python became a common language for a wide range of applications. So, the wish to control a Tracii XL 2.0, a Connii or a I2C Negative Tester by a Python script has become obvious. Since telos provides .NET-libraries to access its I2C products, an easy way to integrate I2C accesses into existing python scripts is by using packages like python.NET.
This article provides examples that can serve as a starting points for individual solutions that use telos I2C products via Python scripts. The first section shows, how to use the master capabilities via a script. The Tracer is used in the second script and in the final example a Negative Tester is used in combination with a Tracer.
Step by Step: A simple Master Script
The first example demonstrates, how I2C-master-messages can be sent and received using a Python script.
Hardware Requirements
It is assumed that a telos I2C product like Connii MM 2.0 or Tracii XL 2.0 is connected to the PC’s USB port. Additional to that, the device should provide the valid licenses for Master and Tracer. If the Negative Tester example should be used, an appropriate telos Negative Tester and a telos Tracii XL 2.0 with Tracer license (e.g. telos Negative Tester Bundle) should be connected. Additional to that, an appropriate I2C Slave device should be connected to the telos I2C device too. This device should support an I2C base address like [0x50]. If there is no real I2C Slave hardware available but a Tracii XL 2.0 is used, please start the telos I2C Studio and activate the built in Software Slave at address [0x50]. Without any Slave device connected or simulated, the I2C communication fails.
Preparation
In order to access the telos I2C products, the python interpreter needs access to the .NET libraries provided by telos and that are part of the distributions of I2C Studio. The following examples are based on the assumption that these libraries are located in the same folder as the script itself.
So, the files [i2capi_dotnet_net40.xml] and [i2capi_dotnet_net40.dll] should be copied from the sub-directory [lib/dotnet/x86] or [lib/dotnet/x64] of your I2C Studio installation to the script directory.
Imports from Python- and .NET-World
In order to be able to use elements from the .NET world in a python script, the module [clr] must be imported inside the Python code first:
import clr
The [clr] module provides a function to add a reference to a .NET-DLL. If this module is not installed yet, the Python interpreter will create an exception. In this case, please install the [pythonnet] module using the Python console as follows:
pip install pythonnet
By calling the [clr] function, the I2C.NET API becomes available to the Python script:
clr.AddReference("i2capi_dotnet_net40")
Built-in .NET types are available now and some of them have to be imported for the following script:
from System import Enum
from System import Array
from System import Byte
from System import UInt32
from System import UInt16
Beside the built-in types, elements of the I2C.NET API have to be imported, also:
clr.AddReference("i2capi_dotnet_net40")
from telos.I2cApi.DotNet import Board
from telos.I2cApi.DotNet import BoardType
from telos.I2cApi.DotNet import I2cAddress
from telos.I2cApi.DotNet import Master
from telos.I2cApi.DotNet import MasterMessageTx
from telos.I2cApi.DotNet import MasterMessageRx
from telos.I2cApi.DotNet import MasterMessageList
Selecting the I2C Adapter
Before a script can perform any I2C-transfers, it has to connect to a telos I2C adapter. Therefore, a Board object has to be created.
board_master = Board()
Once, the Board object has been created, it has to be bound to a certain I2C-adapter by calling the object’s Open()-method. There are several variants of that method available and in this example, we focus on the Open()-method that requires a HardwareInfo-object as parameter.
For each I2C adapter that is connected to the PC, such a HardwareInfo-object is available. A complete list is provided by the Board object:
hardware_list = board_master.ListOfBoards
Even though the name HardwareInfo suggest something else, there is always one HardwareInfo object available which describes the DUMMY device, which is only a software simulation of an I2C adapter. For that reason, the ListOfBoards property usually provides two or more entries if one or more I2C adapters are connected to the computer. So, it is necessary that the script chooses the desired board. In Python, filters provide an elegant way to reduce the number of available elements to those which are actually useful.
physical_hw_list = filter(lambda brd: not Enum.GetName(BoardType, brd.BoardType) == "DUMMY", hardware_list)
As the script will work only on boards that can operate as I2C-masters, the list should be further reduced by removing non-master boards:
master_hw_list = list(filter(lambda brd: brd.Master, physical_hw_list))
Now, the ‘list’ should contain exactly a single entry. That’s the HardwareInfo object which is going to be used to establish the connection:
board_master.Open(master_hw_list[0])
From now on it is possible to control the I2C-Adapter via the python script. For example, the I2C power supply can be set, if desired. The following line instructs the I2C-Adapter to apply 3,3 V:
board_master.I2cVccSupply = 3300 # "0" if must not be powered from the I2C-Adapter
Final Cleanup
Before the script exits, the Board object’s Dispose() method must be called — failing to do so will raise an exception.
board_master.Dispose()
Transfering I2C Messages
Its time to prepare the actual I2C messages that shall be transferred. The first example shows a TX-message that sends the bytes 0x01, 0x02, 0x03 to the slave with the 7-bit-address 0x50. The slave-address is represented by a dedicated object:
i2c_address = I2cAddress(0x50, False)
The data that shall be transmitted to the I2C-slave must be available in the correct .NET-type, too. To provide it correctly, the Python-style list of values must be converted into a .NET array:
data = Array[Byte]([1, 2, 3])
Finally, the master message object can be created and sent. Here, we use the board’s master-property, which provides the TransferData command.
message_tx = MasterMessageTx(i2c_address, data)

board_master.Master.TransferData(message_tx)
In order to receive data form an I2C-slave, a MasterMessageRx-Object has to be created. In order to receive 12 bytes from the slave, a corresponding object can be created in the following way:
message_rx = MasterMessageRx(i2c_address, UInt32(12))
Then, it can be transfer can be performed and after the successful transfer, the result can be evaluated.
board_master.Master.TransferData(message_rx)

print(message_rx.Data)
Step by Step: Tracing the I2C Bus Traffic
Tracing the I2C bus traffic is, certainly, also possible, provided that an adapter with tracer capabilities is connected to the PC.
The first steps (importing necessary packages, and adding references) are similar to the example above except for certain packages that are dedicated to tracer functionality only.
import clr
from time import sleep
clr.AddReference("i2capi_dotnet_net40")
from System import Enum
from System import Array
from System import Byte
from System import UInt32
from System import UInt16
from telos.I2cApi.DotNet import Board
from telos.I2cApi.DotNet import BoardType
from telos.I2cApi.DotNet import TracerMessageList
from telos.I2cApi.DotNet import TracerMessageType
from telos.I2cApi.DotNet import TracerMessageDataConfirmation
When we select the desired board, we have to look for a board with the capability to trace not to operate as a master. Therefore, the applied filter differs slightly:
board_tracer = Board()
list_of_boards = board_tracer.ListOfBoards
physical_devices = filter(lambda hardware: not Enum.GetName(BoardType, hardware.BoardType) == "DUMMY", list_of_boards)
tracer_devices = list(filter(lambda hardware: hardware.Tracer, physical_devices))
hw_tracer = tracer_devices[0]
board_tracer.Open(hw_tracer)
# For this example, the tracer is instructed to forward all traced messages without filtering
board_tracer.Tracer.EnableAllAddresses()
trace = TracerMessageList()
board_tracer.Tracer.TracerMsgList = trace
# Once, the tracer is properly set up, it can be activated
board_tracer.Tracer.Enabled = True
message_count = board_tracer.Tracer.ReceiveMessages()

while message_count == 0:
  sleep(0.1)
  message_count = board_tracer.Tracer.ReceiveMessages()
tmp = trace
trace = TracerMessageList()
board_tracer.Tracer.TracerMsgList = trace
The TracerMessageList tmp isn’t filled any longer and its content can be processed (e.g. printed to the console).
Final Cleanup
Make sure to call Dispose() on the Board object at the end of the script. Without it, an exception will be thrown when the script terminates.
board_tracer.Dispose()
Step by Step: Using the Negative Tester
Imports
import sys
from time import sleep
import clr
clr.AddReference("i2capi_dotnet_net40")
from System import Enum
from System import Array
from System import Byte
from System import UInt32
from System import UInt16
from System import Boolean
from telos.I2cApi.DotNet import Board
from telos.I2cApi.DotNet import BoardType
from telos.I2cApi.DotNet import NegativeTester
from telos.I2cApi.DotNet import NegativeTesterMaster
from telos.I2cApi.DotNet import TracerMessageList
from telos.I2cApi.DotNet import TracerMessageType
from telos.I2cApi.DotNet import TracerMessageDataConfirmation
from telos.I2cApi.DotNet import I2cAddress
Preparing the Testsequence
i2c_address_1 = I2cAddress(UInt16(0x50), False)
message_data_raw = list(map(lambda value: value & 0x00FF, range(10)))
message_data_array = Array[Byte](message_data_raw)
nt_sequence = NegativeTesterMaster()
nt_sequence.LoopCount = 5
nt_sequence.Bitrate = UInt32(100000)
nt_sequence.SendTransmitter (i2c_address_1, message_data_array)
nt_sequence.Bitrate = UInt32(400000)
nt_sequence.SendTransmitter (i2c_address_1, message_data_array)
nt_sequence.Bitrate = UInt32(300000)
nt_sequence.SendTransmitter (i2c_address_1, message_data_array)
Connecting to the I2C boards
board_tracer = Board()

board_negative_tester = Board()

physical_devices = list(filter(lambda hardware: not Enum.GetName(BoardType, hardware.BoardType) == "DUMMY", board_tracer.ListOfBoards))

negative_testers = list(filter(lambda hardware: hardware.NegativeTester, physical_devices))

tracers = list(filter(lambda hardware: hardware.Tracer, physical_devices))

board_tracer.Open(tracers[0])

board_negative_tester.Open(negative_testers[0])
Running the Test
This example can be executed with a Negative Tester directly connected to a Tracer. In that case, the software slave should be enabled via I2C Studio. In such a setup, either the Negative Tester or the Tracer has to provide the power supply for the I2C bus. The example choses the Negative Tester as source:
board_tracer.I2cVccSupply = 0

board_negative_tester.I2cVccSupply = 3300
Its time to start the Tracer:
trace = TracerMessageList()

board_tracer.Tracer.TracerMsgList = trace

board_tracer.Tracer.EnableAllAddresses()

board_tracer.Tracer.Enabled = True
board_negative_tester.NegativeTester.StartMaster(nt_sequence.GetMessages())

while board_negative_tester.NegativeTester.IsRunning:
	sleep(1)
nt_sequence_total = 0
message_count = board_tracer.Tracer.ReceiveMessages()
nt_sequence_total = nt_sequence_total + message_count
while message_count > 0:
	message_count = board_tracer.Tracer.ReceiveMessages()
	nt_sequence_total = nt_sequence_total + message_count
Evaluating the Results
start_timestamp = trace[0].Timestamp

for message in trace:
    line = str(message.Timestamp - start_timestamp).rjust(15)
    line += ": "

    enum_name_message_type = Enum.GetName(TracerMessageType, message.Type)
    line += enum_name_message_type.replace("MSG_FRAME_","").ljust(8)

    if "MSG_FRAME_DATA" == Enum.GetName(TracerMessageType, message.Type):
        enum_name_confirmation_type = Enum.GetName(TracerMessageDataConfirmation, message.Data.Confirmation)
        line += enum_name_confirmation_type.replace("DATA_CONFIRMATION_", "").ljust(6)
        line += '0x{:02x}'.format(message.Data.Data).upper().rjust(3)

    print(line)
Finally doing Cleanup
# As a very last step, the two boards have to be disposed:

board_tracer.Dispose()
board_negative_tester.Dispose()